Freshly squeezed orange juice ice cubes

Work it, girl!

Work it, girl!

Ever since I found out that traces of a cancer-causing form of arsenic have been found in several brands of both apple and grape juice, I’ve been on a mission to find alternatives for my little guy.

We first got into the juice habit when Bug was about 18 months old in hopes of weaning him off “Mom Milk.” He wasn’t really into water, or cow milk. But apple juice, well, he might make an exception for apple juice.

So, sometimes when he was clamoring for Mom Milk a bit too loudly, I would counter with apple juice, which he mostly accepted. (Although it didn’t seem to dim his interest in Mom Milk at all – a year later I am still trying to wean. Yeah, I know, hippie mama alert, though I can honestly say I did not plan to breastfeed for quite so long.)

So we fell into the juice habit, and soon he was asking for it daily.

At the time, I was still trying to do my grocery shopping with little dude in tow, which was total chaos. So I wasn’t really able to look too closely at the labels and see what the difference was amongst all the options out there. Mainly I was just trying to get out of the store as quickly as possible before a meltdown opportunity arose.

But I figured if I stuck with 100% juice, with no added sugar, he would at least be getting some sort of nutritional value (in my mind, it was like eating fruit in liquid form). And I figured the organic version was basically insurance against anything funky in there.

Most of the time I bought apple juice because it was usually the easiest of all the juices out there to find a version that was 100% juice, with no added sugar, and organic.

Until I read about the whole arsenic hullabaloo. Apparently several brands of apple and grape juice, including organic versions, had traces of a cancer-causing form of arsenic (and lead, sheesh) at levels higher than the federal limit for drinking or bottled water (although there is not currently any federal limit for these substances in juice).

Which made me realize that I actually knew very little about juice, about where it comes from, how it is produced, what all the different types are, how much sugar is in them, etc. I also had no idea how much, if any, was ok to give my little guy.

So I set about researching all the above, which led me down the rabbit hole, from which I did not surface for several weeks.

I’m not quite sure that I have it all figured out, but at least I have a sort of rationale for it all.

So it turns out that pediatricians recommend kids between 1 and 6 years old drink no more than 4 to 6 ounces of juice daily. That’s about 1/2 to 2/3 of a cup, which is actually less than many of the juice boxes on the market – many contain 8 ounces, or about 1 cup.

Then there are all the different kinds of juices out there.

At my local Fred Meyer, there is nearly a whole aisle dedicated to shelf stable juice, a refrigerated case for perishable juice, a freezer section for frozen concentrate, plus another small aisle for organic or “healthier” shelf stable juice.

Within each of those sections is a crazy amount of variety, everything from 100% juice to “flavored water beverage,” which is essentially sugar water with fruit flavor (ahem, Capri Sun Roarin’ Waters).

So which kind of juice is best?

Whenever I start to get overwhelmed at the grocery store, I turn to Marion Nestlé for insight. Her book, What To Eat, gives some basic guidelines on how to navigate the incredibly complex landscape that is our food system. She has this to say about juice:

“On the basis of taste and, to a lesser extent, nutritional value, the priority order for juices is 1) fresh-squeezed, 2) squeezed and pasteurized, and 3) reconstituted from concentrate…”

Of course, once I figured all that out, I came across this article that basically says even 100% juice is essentially just as sugary and implicated in childhood obesity as soda. With some vitamins and minerals mixed in. Apparently it’s not quite the same as drinking liquid fruit. The line that really caught my attention was that 1 cup of juice has the same amount of sugar as 6 apples, without all that good fiber.

Who knew something so simple could be so complicated?

After all the research I was ready to give up on juice and just stick with water. Which is certainly the easiest and most cost effective option out there.

But, realistically, when we go on play dates and all the other kids are running around drinking all kinds of alluring concoctions from all sorts of fun packages, it sure is a tough sell to bust out the homely mason jar full of totally boring water.

As it is, Bug is always interested in what everyone else is consuming, and is not above sampling someone else’s sippy cup or juice box.

So, it would be nice to give him something that was enticing enough to keep him from grabbing other kid’s drinks, but not too crazy sugary, or ummm, arsenic-laden.

So what is a mama to do? I think Nestle sums it up nicely:

“…choose the freshest 100 percent juices you can afford, don’t drink too much of them (12 ounces a day is more than enough for an adult), and leave everything else – juice drinks, sports drinks, buzz drinks – where you found them. Do not let your children drink more than 6 ounces of juice a day, and do not let them drink “juice” drinks at all except, perhaps, as an occasional treat – just like any other candy or dessert.”

So very sensible. I figured if we stuck with her recommendations, we would be doing ok.

So I scoured the grocery store looking for suitable alternatives and found not a whole lot, actually. There were plenty of 100% apple juice options out there, which I don’t intend to rule out completely, though I do plan to cut down on it until federal limits are in place for arsenic levels in juice. There were also a lot of 100% juices (cherry, cranberry) that included apple or grape juice concentrate, I’m assuming as a sweetener. I did turn up a shelf stable organic 100% pineapple juice, surprisingly not from concentrate, and a shelf stable 100% prune juice, also not from concentrate, both of which would be great to have on hand.

But I figured homemade would be fresher and tastier than anything at the store.

At first I considered buying a juicer, and making him juice fresh everyday. But yeah, waaay too much effort. We used to have one and it got very little action, mainly because it was such a pain to use. It had a million pieces and somehow always managed to leak juice all over the counter. I really couldn’t see hauling that thing out everyday, washing and prepping a bunch of fruit or veg, then cleaning up the mess. Plus, it takes a whole lotta fruit and veg to make just a little bit of juice. And I sure don’t need another contraption to care for.

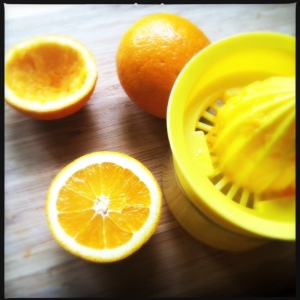
But I liked the idea of juicing, and thought maybe juicing oranges would be doable, in small batches. So I bought a low tech juicer for 2.99 at Target and a bag of Valencias, and I was good to go. It was super easy to make, super easy to clean up and super tasty too, way better than anything at the grocery store. A totally viable option most of the time, except for those mornings when we are rushing to get out of the house.

Then I came across this post (which has just been switched to private, looks like) and my mind was blown. Homemade orange juice concentrate! What! I could squeeze the juice fresh, freeze it, then make a batch as needed, instead of juicing on demand every time. Plus I liked the idea of blending the pulp right in, so it really is more like drinking an orange.

I was all set to give it a go, but then I came across this post for super cute ice cubes. So adorable, right?

And I thought, what if these two ideas hooked up and had a baby?

Then you would totally get fresh squeezed orange juice concentrate ice cubes!

I liked this idea even better. With the ice cubes I could make tiny batches whenever for my little munchkin, since neither hubbie nor I drink much juice anyway.

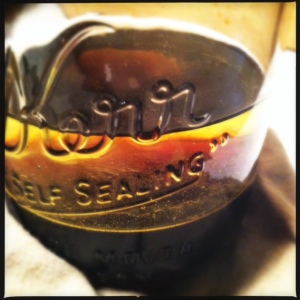
In my mind, I imagined adding some water to the homely mason jar, then throwing in a few orange juice ice cubes, instantly transforming it into toddler bait.

Which it does, more or less, although Bug usually ends up pouring out the water so he can focus on working over the ice, which keeps him quiet for a good 15 minutes or so.

Not quite what I had in mind, but I’ll take it.


Freshly squeezed orange juice ice cubes

Recipe notes: I tried a batch with the whole fruit blended right into the juice, like in the post for orange juice concentrate, which made a sort of thick purée. But honestly, I was not that into them. I liked the wholesomeness of them, but the taste was kinda meh, especially when mixed with water. Maybe because the oranges I used were better for juicing than eating in the first place. So anyway, now I just juice the oranges, plain and simple. I freeze the juice in an OXO ice cube tray, which makes 14 ice cubes. About 5 or 6 large oranges make enough juice to fill the tray, and 6 ice cubes is about 4 ounces (1/2 cup). Originally I intended to add the juice cubes to water, to dilute the juice a bit and get a little more bang for the buck (which would have made them more like orange juice concentrate), but now I mostly just give Bug a juice cube and let him go to town. If we are headed out for a play date, I just throw a handful of juice cubes in a mason jar and by the time we are ready for snack time, they are slushy and melty and good to go. I included rough measurements for those trying to stick closely to the 4-6 ounce rule. Do I stick to the rule? Honestly, it depends on the day. Some days I am just trying to survive, and if that means a little more juice for Bug, well, then let’s get the party started.

Ingredients

A big old bag of oranges

Directions

Juice those oranges. You better work (this is my soundtrack for juicing). Pour juice into ice cube tray and freeze. To serve, add 6 juice cubes (1/2 cup or 4 ounces) to ¼ to 1/2 cup of water (2 to 4 ounces). Or just nix the water and down those cubes neat.
Pain in the Arsenic

arsenic

I’m not sure what I was doing back in November 2012, but I somehow missed the whole arsenic in rice thing.

I came across a reference to it in a New York Times article several weeks back, and as a pretty frequent consumer of rice, of course I wanted to know more.

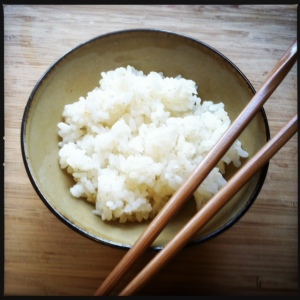
So I clicked on the link to the findings, and learned that not only are significant amounts of a carcinogenic form of arsenic often found in both white and brown rice, it is also widely found in apple and grape juice.

I’m not sure what I was doing back in January 2012 either, but I somehow missed the whole arsenic in juice thing too.

It was devastating news, especially since my little dude eats rice and drinks apple juice on a regular basis. Like, almost everyday. Oh great, have I been slowly poisoning my little baby?

It was almost too much to process all at once. I took at cursory glance at the pantry and chucked a few items, like a partially consumed package of Lundberg rice cakes and a couple of boxes of apple Juicy Juice. Then I went on with my day, unsure what I should do next.

Usually when the latest food scare hits, I research as much as possible and then adjust my habits as needed based on the information at hand, however incomplete. Basically I just try to keep calm and carry on.

But with the whole arsenic thing, I am more apt to break down and freak out.

One of my main jobs as a mama is to feed my little baby good, healthy food (ahem, when he is not busy stuffing fistfuls of Pirate’s Booty and Annie’s Fruit Snacks in his piehole).

I go to great lengths to rustle up the best I can find. I read all the labels. I buy mostly organic. I shop at the farmer’s market. I regularly make a 60-mile trek for specialty items, like organic meat, which is not always available around these parts. Little by little, I am trying to replace packaged foods with homemade versions (so far, I’ve got mayo, whole wheat tortillas and granola bars pretty much down, although I’m still working on bread). Yeah, I’m kinda neurotic about it all.

So when it turns out that two major staples of our daily diets may be laced with arsenic, well, it makes me want to move to the country and raise all our own food, like a doomsday prepper getting ready for the coming zombie apocalypse.

(Oh wait, we already live in the country. I reckon it’s about time we finally till all those blackberry brambles.)

Seriously, while it’s not likely I will ever muster the energy to dig a rice paddy and grow my own arsenic-free rice, I did briefly contemplate planting some apple trees and juicing our own pristine apple juice fresh every morning. Crazy? Or crazy awesome?

(Although, in addition to all the arsenic still hanging around in the environment from pesticides, it is apparently also widely found in nature, and rice and apples for some reason are super good at absorbing the chemical, more so than the average crop. So even growing my own may not do much good anyway. Bummer.)

Anyway, I guess I just don’t know what to make of it all. Like, should I immediately cease all consumption of any suspect products? Or am I veering into crazytown territory? All I have to go on is what the internets tell me. And that is a conflicting mess of science and politics.

So, as I fumble my way through the impenetrable fog, I plan to scale down our consumption of both rice and apple juice a bit (not to mention beer, chicken and ummm, wooden playgrounds), until I figure out what in tarnation we should do.

For the time being, I think that will mean limiting our consumption of cooked rice to just a couple times a week, and eliminating all products containing rice (no more Rice Chex, Crispix, Lundberg Rice Cakes, Japanese rice crackers, brown rice syrup, or anything with rice flour in it, including the aforementioned Pirate’s Booty).

As for juice, well, juice is a little more complicated. Just don’t buy any apple or grape juice, right? Yes, but then I found out that most not-from-concentrate orange juice can apparently sit around for up to a year before it gets packaged, at which point it is freshened up with chemical flavor packs, which weirds me out a little. So there’s that.

Plus, it also seems like a lot of “healthy” products out there use apple and grape juice concentrate as an alternative to refined sugar, like the Trader Joe’s raspberry jam and Nature’s Path Corn Flakes I have in the cupboard.

And then what about apples and grapes themselves? If the juice is high in arsenic, then aren’t the apples and grapes too?

Oy, my head hurts.

So over the coming months, I think there will be a great purging of the pantry, a hunt for better alternatives and a whole lot more cooking.

Easy Split Peasy

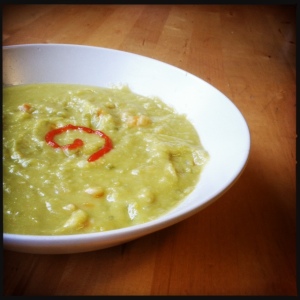
Mmmm, sludge.

Mmmm, sludge.

I know it’s technically spring, but around these parts, it’s still split-pea weather.

We had an all too brief dalliance with sunshine and lollipops a week or two ago, but now, nothing but gray and rain and that deep chill that rises up from the ground through your boots and permeates your entire being from the inside out.

Which is just my way of saying it’s cold and wet and I would like a big bowl of soup, please.

Lately that means split pea soup. Lots of it. This version is super hearty and comforting, guaranteed to punch the chill right in the face.

(Of course, in the last couple of days that I’ve been working on this post, the forecast has turned to sun for the next week. Usually spring is a gloomy, sodden affair around here, so I thought I was safe posting a recipe for soup. Stupid Oregon. Although I suppose I should be happy for the unexpected sun.)

I first started making this dish something like four years ago, based on a recipe from a special edition on soups and stews by Cook’s Illustrated, back when I used to buy magazines printed on actual paper.

I followed that recipe pretty faithfully until I misplaced it somewhere, and had to wing it based on my own pretty faulty memory, which is to say I basically made it up on the spot because I could not for the life of me remember the split pea to liquid ratio. It came out surprisingly delicious.

What this little experience taught me was to go ahead and take the plunge. When I was just a wee lass, I spent many many days at the pool before I ever worked up the courage to jump off the diving board. I knew how to swim. I could hold my breath like a little fish. But that diving board was scary. Until one day my friend did it, and basically shamed me into trying. So I climbed up there, all nerves and butterflies, and took the plunge. My instincts kicked in and before I could even register what was happening, I popped back up to the surface. My body knew what to do even if my brain didn’t.

I know, deep thoughts, right?

Up until I lost that recipe for split pea soup, I tended to stick pretty closely to recipes as written, which I culled from only the most trusted of sources. Then I would scroll through the comments looking for reviews and helpful hints. If the recipe employed new techniques, I would research them ad infinitum before trying them.

But I had been cooking fairly frequently for several years by then, and reading up on all sorts of cookery, and I suppose subconsciously absorbing the fundamentals in my own way. It helped that the special edition on soups included a primer on how to make soup.

I guess I knew more than I realized, and truly, soup is pretty hard to mess up.

So armed with my working knowledge of split pea soup, and soup in general, I whipped up a batch, tasting and tweaking along the way. I sort of bumbled my way through, but my body knew what to do. I have since found that Cook’s Illustrated recipe again, but I never use it anymore. Instead I make my bumble version, fine-tuning it a bit every time. This is the latest version.

Easy Split Peasy

Adapted from Cook’s Illustrated

Recipe notes: This is a very easy recipe to make, with very basic ingredients. But it does, however, take a while for the split peas to magically transform from tasteless little BBs into crazy goodness, at least a full hour. If you try to cut it short, the results are somewhat meh. Believe me I’ve tried. Some stuff just takes a while to cook, that’s all there is to it. So if you’re planning to make this for dinner, it’s wise to get an early start. For those who work, it’s probably best to make this on the weekend, when you have a bit more leeway in the schedule. Waiting for a pot of this after a long day at work is just asking for a hangry meltdown. There are all sorts of ways to make split pea, but the one true method, is to cook the soup at a relatively high heat until the split peas pretty much fall apart – no blending required. This also turns the soup into a delicious, thick sludge that turns almost solid in the fridge. Of course, not everyone is as fond of sludge as we are, but it’s easy enough to adjust the consistency with a bit of extra water and seasoning. In fact, that is the one big variable of this recipe – you can get very different consistencies depending on how high the heat is, and whether or not the pot is covered. So even if you follow the instructions to a T (although the instructions are none too precise), the consistency can still vary quite a bit. It’s hard to predict sometimes, but easy to fix. If your soup is too thick after an hour, simply add some water and salt to taste. If it’s too soupy, just turn up the heat, keep the lid off and let some of that liquid evaporate. I should mention that this version calls for a fair amount of veggies, more than most recipes, because, well, I like veggies. Also, this version has no ham or bacon because I rarely have them on hand. I use bouillon instead to add a bit of flavor, or when I have it, bacon fat, which I keep in the freezer.

Ingredients

Oil, bacon fat, butter, coconut oil, whatever floats your boat

2 small onions (about 1 3/4 cup to 2 cups chopped)

4-6 medium carrots (about 1 3/4 cup to 2 cups chopped)

5-7 stalks celery (about 1 3/4 cup to 2 cups chopped)

1 tsp salt

1 large russet potato

2 cups split peas, pick through and rinsed (I think a 16 ounce bag is technically equivalent to 2 1/4 cup of split peas. Go ahead and throw in the extra ¼ cup if you don’t want a weird amount of peas left over. I buy them from the bulk bin, so it’s easy enough to just measure out 2 cups.)

10 cups water

4 teaspoons chicken or veggie bouillon (I tend to use bouillon instead of broth because, I don’t know, I just got into the habit of it, OK? Plus it keeps a long time. I use Better Than Bouillon because it ranked well in a Cook’s Illustrated taste test. If I could get it together, I would make my own broth, but yeah, let’s be honest, that ain’t happening any time soon. If you would rather use broth, use 6 cups water and 4 cups broth and nix the bouillon.)

2 tablespoons vinegar

Directions

Get an early start, say 4 if you want to eat dinner by 6. Does anyone eat dinner at 6? I can’t seem to get dinner on the table before 7:30, and I’m a stay at home mama.

Chop the carrots, celery and onions. Put in a dutch oven along with your fat of choice and 1 tsp of salt. Sauté until the vegetables soften and get a bit of color, which takes a while, at least it does on my ancient electric stovetop. Meanwhile, chop the potatoes and boil the water.

Once the veggies are ready, dump in the 10 cups of hot water, bouillon, split peas and potatoes. Bring to boil, then turn down a bit and let that baby simmer pretty hard for at least an hour (more like an hour and 20 minutes on our funky old electric stove). Do not cover. Give it a good stir every so often to make sure the soup doesn’t stick or burn to the bottom.

If it’s too thick, add some water and adjust the seasoning. If it’s too thin, let it bubble away a while longer.

Add vinegar when it’s done. When is it done? When it’s thick and creamy and tastes divine.

Ladle into serving bowls and give that bad boy a good squirt of sriracha, if you are into that sort of thing.

Hippie Easter Eggs

eastereggs

The last time I made Easter eggs was something like 30 years ago, so yeah, it’s been a while.

When I was a kid, mom always busted out the PAAS, and we would spend a pleasant afternoon dunking hard boiled eggs in bowls of neon color. Sometimes we would get fancy and add a pattern or two in crayon, but usually we just dyed them a single color and called it good.

That stopped sometime around when I turned 10 (so that makes me nearly, ahem, 40!)

Things have clearly changed since then. I see now that PAAS has rolled out a whole new product line. Check out the bedazzled version, and the monster truck one. Next up, egg tats. Oh wait, that already exists.

PAAS even has an app, in case you want to go digital with your creations.

And if you really want to get crafty, Martha Stewart has a veritable library of egg decorating ideas, including these fabulous gilded eggs that would totally go with these cashmere bunnies.

The hipsters are also apparently in on the action.

I found all these options a bit overwhelming for my first egg dying session after a very long hiatus and briefly considered abandoning the whole thing.

But I knew little dude would absolutely love the whole Easter Egg thing, so I resolved to give it a go.

In the end I decided to go the hippie route and dye my eggs au naturel, with vibrantly hued veggies and spices.

There are all sorts of guides out there, but the two I relied on most were from Martha Stewart, for the overall how-to, and Bon Appetit, for the actual dye recipes.

The first matter of importance is whether to go with hard-boiled eggs, or blown out. I think we all know the answer to this one – hard-boiled. Who wants to bother with sticking a pin gingerly through each end and blowing out a bunch of raw egg? Way too much effort. Hard-boiled eggs are a lot easier to make, and then you don’t have to worry about lunch for a while.

The second matter of importance is whether to boil your eggs in the dye, or let them soak in the cold dye. Boiling the eggs in the dye apparently yields more brilliant colors, but these days I have a super short attention span and would probably end up with a bunch of rubbery eggs if I tried to manage 4 pots of boiling water at once. For the sake of simplicity, I went with the cold soak.

Once that was decided, the rest was pretty straight forward.

Since there are just 3 of us, I figured we would do a dozen eggs in 4 different colors, so 3 eggs of each color.

There’s a whole cornucopia of tantalizing dye recipes out there, using all sorts of interesting ingredients.

It was tough to narrow down, but due to the aforementioned attention span issues, I thought it prudent to limit my colors to just four – blue, yellow, pink and green.

As it turns out, the Bon Appetit version was a perfect fit for my specs. Not only did it include my chosen colors, but the recipes yield just enough dye to fully submerge 3 eggs (at least in theory, more on that later). Also, since the green dye is actually made of 2 other colors (yellow and blue, natch) you only have to make 3 dyes, then mix 2 to get the fourth.

So here is what I did:

-Boiled a dozen eggs. I went with white. Stored them in the fridge overnight until I could make the dyes the following day.

-Made the dyes. See recipes below. For the beets, I went rogue and used about a cup of the beet stalks instead. I just couldn’t bear to part with the beets. Big mistake. More on that later. Also, I accidentally simmered the red cabbage and beet stalk dyes at too high a heat. For my beet dye, I started with 3 cups and ended up with 1 1/2 cups, which just baaarely covered my 3 eggs. Same with my red cabbage dye, I started out with 4 cups and ended up with 2 ½ cups, which was not nearly enough.

-Strained the 3 dyes, then measured 1 1/2 cups of each into 3 separate containers (I used recycled spaghetti sauce jars). By design, I ended up with extra red cabbage and turmeric dye. To get the green dye, I had planned to mix 2 cups of the red cabbage and 1/4 cup of the turmeric in a separate container, per the Bon Appetit instructions. But I only had 3/4 cup of red cabbage left over. Oops. Luckily I had some extra turmeric, so I improvised and mixed in 3/4 cup of turmeric to get my 1 1/2 cup of dye. The resulting mixture did not look green at all.

-Gently placed 3 hard-boiled eggs into each container.

-Stuck them in the fridge and totally forgot about them until the following day. When I finally retrieved them from the fridge, they were definitely done. I thought the dye would stain the shells, but instead they were covered with a sort of funky, cold patina. Some were splotchy, others had white spots where the shell rested against the glass. The shells were a bit soft, from sitting in the vinegar I think. I made the mistake of rinsing one off, and the color came right off! So I decided to take Martha’s advice and gently shake the dye off and let them dry on a wire rack. The colors turned out fantastic! Except for the beet stalks, that is. The dye itself was neon pink but the eggs came out a muted brown. I tried to save them by soaking them a little longer with the peels leftover from roasting the beets, but they only got the faintest bit of blush, and I was ready to be done at this point. But the red cabbage turned the eggs a vivid turquoise, the turmeric produced a beautiful gold and the two combined made a jewel-like emerald green!

All in all, not too shabby, despite all the unexpected twists and turns. But they did turn out to be waaaay more work than I anticipated, even though I tried to keep it simple by limiting the palette and the quantity. I think next year I’ll just take the easy way out and get this.

Hippie Easter Eggs

Adapted from Bon Appetit

Pink

2 medium beets, coarsely grated

3 Tablespoons distilled white vinegar

3 cups water

Combine beets, vinegar and water. Simmer for 30 minutes, then strain into a large bowl. Let eggs steep in solution for 30 minutes for a delicate light pink, or up to 4 hours for a deeper red.

Blue

2 cups chopped red cabbage

¼ cup distilled white vinegar

4 cups water

Combine cabbage, vinegar and water. Simmer for 30 minutes; strain into a large bowl. Steep eggs in dye for at least 30 minutes. Different cabbages will yield different shades.

Yellow

2 teaspoons turmeric

3 Tablespoons distilled white vinegar

3 cups water

Bring water to a boil; add vinegar and turmeric. Let steep for 10 minutes. Add eggs and let steep in solution for at least 30 minutes and up to 3 hours.

Green

¼ cup yellow dye leftover from above

2 cups blue dye leftover from above

Combine the two dyes. Let eggs steep in solution for at least 30 minutes and up to 3 hours. For a deeper green, combine ¾ cup yellow dye and ¾ cup blue dye.

Dead Easy Whole Wheat Biscuits

biscuit

It was hubbie Lee who first introduced me to the joys of biscuits.

Being a Southerner, he was accustomed to biscuits of all kinds, the best being those made by Mamaw, of course.

In the early days of our courtship, he cooked me a batch of his “bachelor special,” which consisted of green beans and stewed tomatoes on a Pillsbury biscuit.

I don’t know if it was his culinary prowess, or the addictive nature of that poppin’ fresh dough, but I was hooked.

Thereafter, if we ate in on the weekends, chances were high that breakfast would feature a canister of biscuit dough, fresh from the refrigerated section of the grocery store.

Then at some point I got around to reading the list of ingredients. Nothing too surprising I suppose, but definitely a whole lot of things that Mamaw never would have used.

Things like partially hydrogenated soy bean oil, propylene glycol alginate, mono and diglycerides, TBHQ and the like. Albeit in very minute quantities, but still. It just seemed unnecessary for something that is basically flour, fat, liquid, salt and baking powder.

It was this line of thinking that eventually started me down the path of baking.

Except for the random boxed mix over the years, I had virtually no experience in the fine art of baking. The learning curve was steep.

It was years before I worked up the courage to try biscuits, and then it turned out to be sort of a bummer. All the recipes I came across involved cutting chilled butter or shortening into flour, which I found tedious and messy and kind of annoying.

Ok I know, first world problems, but I guess I wanted something sort of like Bisquick, that I could just throw together whenever I got the hankering for biscuits, but you know, without all the trans fat.

So I gave up on biscuits for a time and focused my culinary efforts elsewhere.

Until a year or so ago, when I came across a recipe for these cream biscuits on Serious Eats. They had just two ingredients, self-rising flour and whipping cream! Ok yes, self-rising flour has salt and baking powder in it, so technically four ingredients. But no butter! At least in solid form. It was actually in there, in liquid form, hidden in the whipping cream.

What this meant was no irksome cutting of butter into flour. All you had to do was give the ingredients a quick stir and boom, instant biscuit dough.

Well butter my butt and call me a biscuit! (Or don’t. It’s up to you.) Finally a biscuit that could roll with my lazy ways.

I had to try them right away, and I was sold. It took a couple of tries to get the hang of them, and a little experimenting with flour types. Eventually I found another version of cream biscuits on Cook’s Illustrated, which is now my go to recipe. Of course they are not as good as Mamaw’s, but we have officially retired the Doughboy.

Dead Easy Whole Wheat Biscuits

Adapted from Cook’s Illustrated

Recipe Notes: The original recipe calls for White Lily, self-rising flour, which they do not sell around these parts. So I tried a few different flour types. All purpose flour and whole wheat pastry flour produce a fine, if rather delicate biscuit. White whole wheat flour, on the other hand, makes for a much sturdier biscuit, which is ideal for stuffing full of all sorts of goodies, our preferred mode of biscuit consumption. The dough is rather wet, and sticky. If it misbehaves too badly, add a bit more flour. These are easy enough that I usually just make a half batch for immediate consumption. But one of these days, when I have a bit of free time, I plan to make a double batch, cut the biscuits, freeze them on trays, then store them in a ziplock until needed. I, for one, don’t always have whipping cream on hand, but I recently discovered shelf stable whipping cream from Trader Joe’s, which does the trick quite nicely. I’m going to stock up next time I go!

2 cups white whole wheat flour plus extra for the counter

2 teaspoons granulated sugar

2 teaspoons baking powder

1/2 teaspoon table salt

1 1/2 cups heavy cream

Instructions

1. Adjust oven rack to upper-middle position and heat oven to 450 degrees. Line baking sheet with parchment paper.

2. Whisk together flour, sugar, baking powder, and salt in medium bowl. Stir in the cream with a wooden spoon until dough forms, about 30 seconds. Turn the dough out onto a lightly floured counter and gather into a ball. Knead the dough briefly until smooth, about 30 seconds.

3. Shape the dough into a 3/4-inch-thick circle. Cut biscuits into rounds or wedges (for biscuits, use a biscuit cutter, for wedges, simply cut the dough circle into wedges like a pizza). Place rounds or wedges on parchment-lined baking sheet. (The baking sheet can be wrapped in plastic wrap and refrigerated for up to 2 hours.) Bake until golden brown, about 15 minutes, rotating baking sheet halfway through baking (although I never do this step and they turn out just fine).

Chocolate Guinness Tofu Pudding

chocolate guinness

Back before baby, when I was a busy busy working gal, I was not the sort to get all crafty when holidays rolled around (except for Valentine’s). Far from it. Most of the time, I worked right through them, especially for the lesser, B list holidays (ahem, Presidents’ Day).

But even for the big holidays, my efforts were decidedly lackluster. Let’s just say there were many a hastily scrawled coupon for Christmas gifts over the years.

But now that I am a mom, I am trying to make an effort to celebrate the holidays in all their cheesy glory, for our little dude.

He gets so excited for holidays, especially if any sort of cake is involved.

When he noticed all the leprechaun decorations at the grocery store, I resolved to come up with some sort of Irish feast to celebrate.

But, never having actually celebrated said holiday, let alone cook for it, I was at a loss as to what make.

So I poked around the internets for inspiration, but the luck of the Irish was not with me. I found a whole of lot recipes for Irish soda bread, which seemed nice enough, if rather dull.

Of course there were all sorts of recipes for corned beef, which I learned is not even a traditional Irish dish.

But more than anything were recipes featuring Guinness or whiskey, because apparently the Irish are fond of drink.

I did love the sound of Nigella’s chocolate Guinness cake, which she describes as “magnificent in its damp blackness.” Damp blackness, you say? I was intrigued.

However, to my chagrin, I am not a big fan of Guinness stout, even though I am a wee bit Irish. I might partake of a pint once in a blue moon, but I didn’t really want a whole six pack of the stuff sitting around. Plus I didn’t want to make a whole cake that our little dude couldn’t eat.

Nothing else sounded all that appealing, and I briefly considered scuttling the whole thing.

But then, whilst wandering around the grocery store, I spotted a sixer of Guinness black LAGER, and I thought “Leaping leprechauns! Now there is a fine drink, to be sure.”

Neither I nor the hubbie are much for stout, but lager? Well, that is a different story, laddie!

The stout version is a little too much for my taste, too rich, too filling, if pleasingly creamy. But the lager is fantastic – crisp, slightly bitter, frothy. It might be my new favorite drinky-drink.

With that discovery, the wheels started turning, and all of the sudden chocolate Guinness tofu pudding popped in my head.

I make this easy chocolate tofu pudding all the time, but for special occasions, I bust out this slightly fancier version from The Minimalist.

For St. Paddy’s Day, I thought, why not nix the Mexican flavor and sub Guinness black lager for the liquid?

So I did just that and a fine time was had by all. Except for little dude, he had a fine time but with a Guinness-free version.

Chocolate Guinness Tofu Pudding

Adapted from The Minimalist
Recipe notes: The cool thing about silken tofu is that it turns incredibly smooth and creamy when you give it a good whirl in the blender or food processor. Plus it has a relatively mild flavor, which makes it a wonderful base for puddings with a strong flavor, such as chocolate. Not that I have anything against eggs or milk, but they can be a bit finicky when making pudding or custard. Well, if you are me. I have been known to accidentally scramble eggs when making custard. The tofu is pretty much foolproof. The recipe is adapted from Mark Bittman, but I changed it a bit to work with the package size of the tofu I normally buy, which is Mori-nu. It comes in 12 ounce blocks, whereas The Minimalist recipe calls for 16 ounces. It seemed weird to use 1 full 12 ounce block, and a mere 4 ounces of another block, leaving a random 8 ounces for some other use. So I adjusted the recipe to use a single 12 ounce block. (It turns out Nasoya makes silken tofu in 16 ounce blocks, but I have never come across this product in grocery stores). Also, The Minimalist version calls for 8 ounces of bittersweet or semisweet chocolate, which is basically two full bars of chocolate. That is a little over the top for my budget (and girlish figure) so I dialed back the chocolate a bit too, to just one full bar. This pudding is nice and chocolate-ly, with a subtle, malty finish. And since I went the Guinness route, I thought hey, why not break out the whiskey too? It’s a party over here, and you’re invited. So I found this recipe for whiskey whipped cream, from Pioneer Woman. And to complete the caricature, a bit o’ green, in the form of homemade sanding sugar, from The Sweet Adventures of Sugar Belle. To make an alcohol-free version (and gluten-free to boot), replace the Guinness in the pudding with water, and omit the whiskey in the whipping cream. To make this vegan, skip the whiskey whipped cream entirely, oh and use vegan sugar and chocolate, natch.

½ cup sugar

½ cup Guinness stout or lager

4 ounces bittersweet or semisweet chocolate

12 ounces silken tofu

1 teaspoon vanilla extract

1/8 teaspoon salt

1. In a small pot, combine sugar with Guinness; bring to a boil and cook until sugar is dissolved, stirring occasionally. Take off heat and add chocolate. Cover and let stand 5 or 10 minutes.

2. If you have an immersion blender, add tofu, vanilla and salt to the pot and blend until smooth. If you don’t have an immersion blender, put chocolate mixture in a blender or food processor, add tofu, vanilla and salt and blend until smooth. Divide among 2 to 4 ramekins and chill for at least 30 minutes.

Whiskey Whipped Cream

Adapted from Pioneer Girl

1 cup whipping cream

4 teaspoons whiskey

4 teaspoons sugar

In a cold bowl, beat whipping cream until it starts to thicken, about 5 minutes. Add sugar and whisky, and beat until soft peaks form.

Green sanding sugar

Adapted from The Sweet Adventures of Sugar Belle

Green gel food coloring

Sugar

Put however much sugar you want in a ziplock bag, add a drop of food coloring, close the bag and work the coloring into the sugar. Add more food coloring for more intense color, as desired. Pretty cut and dried, but do check out Sugar Belle’s post on this, the details and photos are the bee’s knees!

Whole Wheat No Knead Bread Recipe Fail

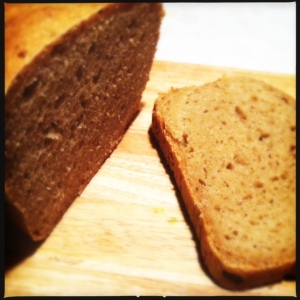
A whole lotta brown.

A whole lotta brown.

So I totally reached a new level of nerdom – I called the King Arthur Flour baking hotline for help.

I was desperate. It was my first go at whole wheat no knead bread and while it looked nice enough, it tasted weirdly…tangy. More like sourdough, with a sort of chemical finish. Not what I was going for at all.

What I was going for was a nice, soft sandwich loaf, sweetened with honey, from Healthy Bread in 5 Minutes a Day, via the King Arthur Flour blog. I’ve had my share of bread disasters in the past, but the recipe seemed easy enough, so I gave it a try.

I love the idea of baking our own bread, but traditional breads seem just a little too fiddly for the chaos around here. Many breads require a period of kneading, then rising, then kneading again, then rising again, often on a strict time table, which is tough to stick to when you have a two year old running around. Can I get a what what?

So I was pretty much resigned to buying our usual bland, squishy loaf at the supermarket, until I came across abin5, somewhere in my internet travels. For the first time, making bread from scratch on a regular basis actually seemed doable.

It combines the flexibility of no knead bread and the efficiency of baking in bulk.

Like the loaf that started the no knead craze, this one depends on a long rise to develop flavor. The cool thing about no knead breads is that the rise, though long, is often quite flexible. The dough for the whole wheat loaf above, for instance, can stay in the fridge for up to seven days, and some can stay in there up to two weeks!

They can handle a little neglect, which is what I look for in a loaf of bread.

But what really sold me on the abin5 breads is a neat little trick – instead of making just a single loaf, it has you make enough dough for multiple loaves. You bake one right away, and keep the rest in the fridge, ready to go, until needed. Then you just lop off a chunk when you need a fresh loaf and throw it in the oven. It saves you a bit of work.

Anyhoo, I followed the directions pretty closely, but I substituted Fleischmann’s RapidRise yeast for the saf instant yeast recommended on the King Arthur Flour website. I figured they were roughly equivalent. Boy howdy, was I wrong!

After my nerdy call to the King Arthur baking hotline (the baker I talked to was suuuuper nice by the way), I learned that RapidRise is really intended for just a single, short rise, after which you throw it in the oven. It is definitely not intended for a 2 hour rise at room temperature and an overnight rise in the fridge. And in my case, the initial rise at room temperature was more like 3 or 4 hours, because I, umm, kinda forgot about it.

(Incidentally, I did some scouting around on the web and found some confusing info on yeast. For the most part, there are three types of yeast – fresh, active dry and instant. Instant yeasts do not need to be dissolved in liquid prior to using, they can be added directly to the dry ingredients. There are all kinds of instant yeasts, including bread machine yeast and pizza yeast. RapidRise, which is made by Fleischmann’s, is also considered an instant yeast, but it’s like instant yeast on steroids, the rise is powerful and aggressive. I noticed Red Star has something called Quick Rise, not sure if it behaves the same as Fleischmann’s RapidRise, but the website does caution against use in refrigerated or frozen dough baking. The kitchn and Wikipedia actually put rapid rise yeasts into their own category, though it’s not clear if anything other than Fleischmann’s RapidRise falls under that category. To make things even more confusing, the King Arthur Flour website notes that while it used to be that you had to dissolve active dry yeast in liquid first, the way it is processed now allows you to skip that step, apparently you can add it directly to the dry ingredients. Sheesh.).

So my dough was over fermented by the time I baked the loaf, and even more so by the time I baked the second loaf about three days later. The first loaf was sour, but not unpleasant with a goodly smear of butter. The second loaf, however, was vile, so I chucked it. Fail!

I do plan to try again, but with the saf instant yeast recommended on the King Arthur Flour blog. (And how is the saf instant yeast different than all the other instant yeasts out there? Not totally sure, even after all that digging around I am still a little confused, but it worked for King Arthur, so hey, that is good enough for me. I thought about substituting good ‘ol active dry, since that is the easiest to find, but I’m kinda chicken after my last experiment so it might be a while before I work up the courage to do it). Of course, we live out in the boondocks and none of the stores around these parts carry the stuff, so further tests are on hiatus until I get me some.

Granola Cookies, aka Breakfast Cookies, aka Kitchen Sink Cookies

granola cookies

My little guy is totally addicted to Annie’s granola bars.

And what’s not to love? They are just soft and chewy enough for his little teeth to bite into without sending cascades of granola bits flying everywhere. They are just wee enough for his chubby little fist to grab and carry with him on all his little toddler adventures. And the wrapper, which I leave on and pull down as needed, keeps him mostly sticky free, until he devours the last little nub.

Plus they are organic with recognizable ingredients and less sugar than most granola bars out there (hey, helps with my mom guilt).

But at nearly $5 a box for 7 little bars, they are kinda on the pricey side. And we go through them super fast around here.

So the other day, I totally spaced out and forgot to pick up a box at the grocery store, which caused a minor meltdown when little dude asked for one later that day.

I managed to distract him (What, you want a granola bar? Hey, let’s go play on the trampoline!), and mentally made a note to go to the grocery store the next day.

But then I thought, ugh, the grocery store. I dread going to the grocery store. Anyone who’s been grocery shopping with a two year old knows what I am talking about. Plus we live out in the country, 10 miles from the nearest Annie’s granola bars, so running out to the store for a single item is not exactly convenient.

Then I thought, what if I made some instead? I’d made granola bars once before, and they were good, and easy to make, but really sticky, and really sweet. I wanted something a little less sweet and maybe not so sticky. I do enough laundry around here.

Then it hit me – what about a granola cookie instead? All the goodness of granola packed into a cute little cookie, what child could resist?

I turned to the internets for research and development and came across these kitchen sink cookies on Martha Stewart. These were just what I was looking for – crisp on the outside, moist on the inside, chock full of fun bits and chunks. It’s like oatmeal cookie’s parents went out of town for the weekend and she invited all her bffs from the pantry over for a night of, umm, granola making.

I did end up tweaking the recipe to healthify it a bit, but they are still cookies after all.

When little dude asked for a granola bar, I distracted him with these (Hey, cookie!) and started thinking about ways to healthify a lollipop.

Granola Cookies, aka Breakfast Cookies, aka Kitchen Sink Cookies

Adapted from Martha Stewart

Recipe notes: This recipe is very versatile – I made a bunch of tweaks with no disastrous results. What I ended up with was a very lightly sweet cookie, not too crumbly, crisp on the outside, soft in the middle. I cut the sugar in half, swapped all purpose flour for white whole wheat, added almond flour for protein, and swapped the chocolate for dates and sunflower seeds. Oh, and switched coconut oil for the butter. Whew. Normally when I sub white whole wheat flour for all purpose flour, I only do up to about 25%, per Cook’s Illustrated. But then I remembered the 100% whole wheat chocolate chip cookies from Kim Boyce, and I thought, let’s do this. So I went for it and did 100% white whole wheat flour. The dates I had were kind of tough and chewy, so I soaked them in apple juice and that made them a little more tender. Actually I soaked them a little too long and they started to turn gelatinous, so then I had to try to dry them out a little. It was a big mess. Don’t soak them too long, 5, 10 minutes tops. These are super easy to make – usually cookies involve creaming room temperature butter and sugar (which I find tedious), then beating in the rest of the wet ingredients, and finally adding all the dry ingredients. But these substitute melted coconut oil for butter, so you can skip the creaming and just mix that bad boy up with a simple wooden spoon, no need to bust out the mixer. There is a lot of measuring due to all the add-ins, but it goes pretty quick. The dough is rather thick – once I got all the stuff mixed in, I scooped heaping tablespoons and basically pressed them into little balls, them smooshed ‘em a bit for that classic cookie shape. They are very crumbly right out of the oven (I know this through scientific, uh, research) but firm up nicely once cooled completely. Then they are pretty portable, if you are into running around with a cookie in your fist. Makes about 26 cookies. If that is too much, scoop all your cookies as directed, bake just a few, then freeze the rest on a baking sheet for a couple of hours. You can then store them in a ziplock bag and bake them straight out of the freezer as needed, adding a minute or two to compensate. Next time I might try adding an extra egg white and maybe some peanut butter for extra binding and protein. And of course there is plenty of room for experimenting with the add-ins.

1/2 cup coconut oil, melted

1/4 cup firmly packed light-brown sugar

1 large egg

1/2 teaspoon pure vanilla extract

3/4 cups white whole wheat flour

¼ cup almond flour

1/2 teaspoon baking soda

1/4 teaspoon baking powder

1/4 teaspoon salt

1 cup old-fashioned rolled oats

1/2 cup chopped dates

½ cup sunflower seeds

1/2 cup sweetened flake coconut

1/2 cup raisins

1/2 cup coarsely chopped walnuts

Preheat oven to 350 degrees. Line baking sheets with parchment paper.

In a large bowl with a wooden spoon, stir oil and brown sugar together until smooth. Mix in egg until well blended. Stir in vanilla.

In a medium bowl, sift together flour, baking soda, baking powder and salt (or just mix together, I never bother with sifting). Add oats, seeds, coconut, raisins, dates and walnuts and stir until well blended. Gradually stir dry mixture into oil mixture until well blended.

Drop batter by heaping tablespoons on baking sheet about 2 inches apart. Press tops down with the bottom of a glass or your hand to flatten cookies evenly. Bake until golden, about 14 to 16 minutes. Cool on pan for 2 minutes. Remove from pan, and finish cooling completely on wire rack.

Update 3/17/2013: I tried a batch with an extra egg white and puffed rice in place of the sunflower seeds. They held together pretty well, but the puffed rice sort of disintegrated into the cookies.

Healthy-ish Beet Cupcakes with Chocolate Ganache Frosting for Your Boo

beet cupcakes

Usually I am not the sentimental sort, but when V Day looms, I can’t resist whipping up something special for my boo.

Back Before Baby, I spent many happy hours concocting all sorts of decadent treats for my guy. One year, in a fit of unabashed sappiness, I crafted a surprisingly convincing 2D Jack Skellington and Sally from melted dark and white chocolate, complete with a chocolate Zero and little chocolate hearts. We ate the whole thing for dinner and washed it down with cheap champagne, lots of it.

But these days, now that I’m a mama, my efforts are a little more, wholesome, shall we say.

Like these here cupcakes. That lovely, vibrant red crumb? The work of beets, my friends! Also, there is whole wheat hiding in there. And the frosting is dark chocolate, which is practically a health food, am I right? OK, so the candy hearts are, ummm, candy. But know that I planned to top these with pomegranate seeds instead, I was just too lazy to peel the dang thing.

Healthy-ish Beet Cupcakes with Chocolate Ganache Frosting for Your Boo

Cupcakes adapted from Sunset Magazine/Diane Morgan. Chocolate ganache frosting adapted from Cook’s Illustrated.

Recipe notes: These cupcakes are super easy to make, but it does take a bit of time to pull them all together. For me, it was easier to roast the beets (along with some other vegetables I planned to put in a stew) a day before, so they were ready to go when I started the cupcakes. The original recipe calls for cake flour, but I never have that on hand, so I went with a substitution. Also, I cut the sugar by 1/4 cup and 2 tablespoons. As for the chocolate ganache frosting, the recipe calls for letting it cool in the fridge for 45 minutes before frosting your cupcakes. If you happen to let the frosting kick it in the fridge overnight, as I did, it may turn a bit hard, which makes it very difficult to work with. You might try whipping it to loosen it up, not sure if heat would help. Also, I’ve tried swapping out the whipping cream for other liquids, but so far that hasn’t worked out. This frosting, it’s finicky, but hey, only two ingredients.

BEET CUPCAKES

Makes 12 cupcakes

1 pound red beets (3 medium), scrubbed

1 cup all purpose flour

¾ cup white whole wheat flour

¼ cup corn starch

1 teaspoon baking powder

3/4 teaspoon kosher or fine sea salt

1/8 teaspoon ground cinnamon

¾ cup granulated sugar

3 large eggs, beaten to blend

2/3 cup canola oil

3/4 teaspoon vanilla extract

1. Roast beets: Preheat oven to 400°. Wrap each beet in foil, put on a rimmed baking sheet, and roast until tender when pierced, 1 to 1 1/2 hours. Let cool. Peel, cut into chunks, and purée in a food processor. Measure 1 1/4 cups purée.

2. Preheat oven to 350. Line a 12-cup muffin pan (1/2-cup size) with paper liners. Sift together flour, corn starch, baking powder, salt, and cinnamon in a medium bowl. Set aside.

3. Whisk together beet purée, granulated sugar, eggs, oil, and vanilla in a large bowl. With a plastic spatula, stir in flour mixture one-third at a time just until smooth.

4. Spoon batter into muffin cups, filling each almost to the top of the liner. Bake until cupcakes spring back when gently pressed and a toothpick inserted in center of one comes out with a couple of moist crumbs clinging, 25 to 30 minutes. Let cool in pan on a rack 10 minutes. Transfer to rack to cool completely.

CHOCOLATE GANACHE FROSTING

Makes about 2 cups, enough for 12 cupcakes

1 cup heavy cream

8 ounces semisweet chocolate, chopped

Bring cream to boil in small saucepan.

Remove off stovetop (this is important. I forgot to do this once and the frosting turned out very, very dense).

Place chocolate in the saucepan, cover and let stand 5 minutes.

Whisk until smooth, then cover and refrigerate until cool and slightly firm, 45 minutes to 1 hour.

Remove from the fridge and frost those babies!

Soy Vinaigrette, or the Only Salad Dressing I Ever Use

soy vinaigrette

Every year come January, I resolve to eat more vegetables.

And, ermmm, exercise more frequently and lose those last five pounds, which I soon forget all about sometime in February, as if those early hopeful days of January never happened.

But this year I have a secret weapon, at least for eating more vegetables. It’s the best salad dressing ever. I came across it on Serious Eats, and I’ve never been the same. I put it on just about any salad, even ones that might not necessarily seem compatible. I have been known to slurp the leftover dressing right out of the bowl. I have the freaking recipe memorized for crying out loud!

OK maybe I am going just a wee bit overboard. But seriously, it’s pretty much the only salad dressing I ever eat anymore.

I keep a mason jar of the stuff in the refrigerator, ready to go should any opportunity for salad arise.

Soy Vinaigrette

Adapted from J. Kenji Lopez-Alt at Serious Eats

A couple notes on the recipe: mine is a pared down version, with fewer ingredients and a little less oil. Originally, I swapped the Dijon for maple syrup, because I was out of mustard at the time, and I find honey a little messy to work with. But I liked the maple syrup version so much I kept it that way. That said, maple syrup is not as good as an emulsifier as mustard or honey, so you need to give the dressing a good shake right before dousing your salad. Read more about emulsifiers and salad dressing in the original post here.

4 tablespoons rice vinegar

2 tablespoons soy sauce

4 teaspoons maple syrup

½ cup canola oil

¼ tsp salt

Put all ingredients in a jar, screw on a lid and shake, shake, shake!